
- How to Migrate from Rank Math to SureRank
- How to Migrate from Yoast to SureRank
- How to Migrate from SEOPress to SureRank SEO
- How to Migrate from Squirrly SEO to SureRank
- How to Migrate from All in One SEO (AIOSEO) to SureRank
- How to Migrate from Slim SEO to SureRank
- How to Migrate from The SEO Framework to SureRank
- Migration Failed: How to Diagnose
- After You Migrate: Verification and Cleanup Checklist
- Sitemaps in SureRank
- How to Enable Video Sitemap in SureRank Pro
- How to Enable the News Sitemap in SureRank
- How to Show the HTML Sitemap on Your Site in SureRank Pro
- How to Regenerate the Sitemap After Excluding a Post Type in SureRank
- Change the Sitemap URL in SureRank
- How to Enable Author Sitemap in SureRank
- How to Exclude Post Types from the Sitemap
- How to Enable the Author Sitemap and Why Authors Are Excluded (Pro)
- Editing Meta Box
- SureRank – Page SEO Checks
- Enabling Page SEO Checks in WordPress
- Image Alt Text – Automatic Optimization
- Link Manager
- Using the SureRank Front-End Meta Box
- How to Edit the Meta Title and Description for a Single Page or Post
- Controlling Indexing with Robot Instructions
- How to Set Global Title and Description Templates with Variables
- How to Set a Canonical URL and How the Canonical Field Works
- How to Fix WWW and Non-WWW Version Redirects to Improve Your SEO
- How to Fix: No H1 Heading Found on Your Homepage
- How to Fix Missing H2 Headings on Your Homepage
- Re-run Checks Button in SureRank
- Fix Critical Error: Another SEO Plugin Detected in SureRank
- Fix Warning: Site Tagline Is Not Set in SureRank
- How to Fix: Robots.txt Contains Invalid Rules in SureRank
- How to Fix Multiple SEO Plugins Detected on Your Site
- How to Fix: Homepage is Not Indexable by Search Engines
- Warning: Homepage Does Not Contain Internal Links
- How to Fix: Search Engine Title is Missing on the Page
- Page Level SEO: Broken Links Detected
- How to Fix Missing Alt Text on Images
- How to Fix Page URLs That Are Too Long
- Page Level SEO Warning: No Links Found on This Page
- Page Level SEO Warning: No Images or Videos Found
- Page Level SEO Warning: Missing Search Engine Description
- Page Level SEO Warning: No Subheadings Found on This Page
- Page Level SEO Warning: Canonical Tag is Missing
- Page Level SEO Warning: Open Graph Tags Missing
- What is Google Search Console and how does SureRank use it?
- Recommended Image Sizes
- SureRank – SEO Check Severity Guide
- Using SureRank with Other SEO Plugins – Best Practices
- Import/Export Feature – SureRank Plugin
- What is llms.txt and Does SureRank Support It?
- Does SureRank offer a keyword rank-tracking feature?
- Does SureRank Come With Google Analytics Integration?
- Email Summary in SureRank
- SureRank Role Manager
- Fixing a Fatal Error After Updating SureRank
- SureRank Server Requirements
- Search Engines Not Indexing Your WordPress Site?
- Sitemap Not Showing in SureRank
- Fixing robots.txt Issues in SureRank
- Why a Working Link Is Flagged as Broken (404)
- Which Pages Are Included in Your SureRank Sitemap
- Fixing False SEO Audit Warnings Caused by Caching
- Fixing “Couldn’t Fetch” for Your Sitemap in Google Search Console
- Troubleshooting: Favicon and Logo in Google Search Results (Supported Formats and CDN Gotchas)
- Customize XML Sitemap Top Bar with surerank_sitemap_top_bar_data
- Analyze ACF Field Content with SureRank
- Preserve Modified Date During Updates surerank_freeze_modified_date
- Customize Final Title Tag surerank_final_title
- Customize Post Type Archive Title Output surerank_post_type_archive_title
- Customize Archive Page Title with surerank_archive_title
- CustomizeModify the Search Results Page Title surerank_search_title
- Customizing the 404 Page Title surerank_not_found_title
- Customizing the Title Separator surerank_title_separator
- How to Remove Archive Prefixes from Titles Using SureRank
How to Generate Open Graph Images in SureRank
SureRank’s Open Graph(OG) Image Generation feature lets you create professional Open Graph images for your posts, pages, and homepage directly inside your WordPress dashboard.
These images appear when your content is shared on platforms like Facebook, X (Twitter), and LinkedIn, helping your links look polished, consistent, and more clickable.
No external tools or manual design needed. You can generate branded OG images instantly, ensuring every shared link looks professional and ready to perform.
Global Image Generation Settings
Step 1: Access Image Generation Settings
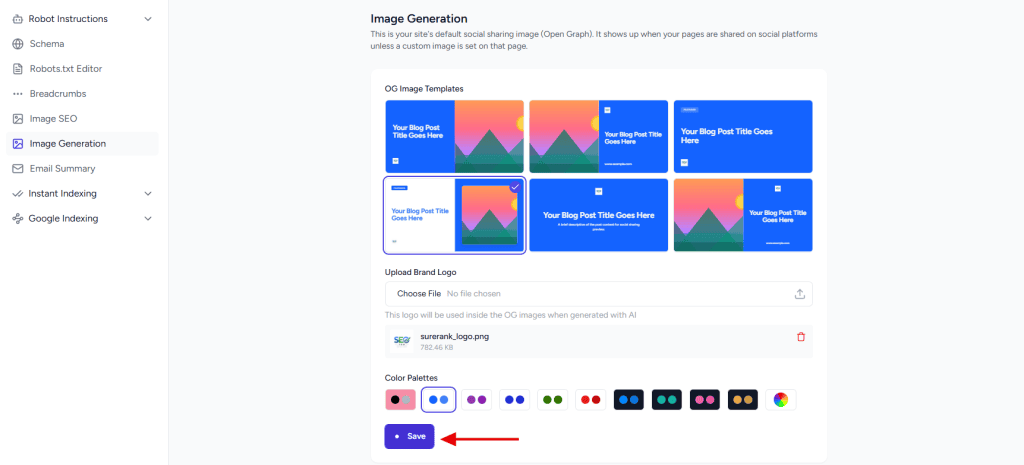
In your WordPress dashboard, navigate to SureRank from the left sidebar, then go to Advanced → Image Generation.
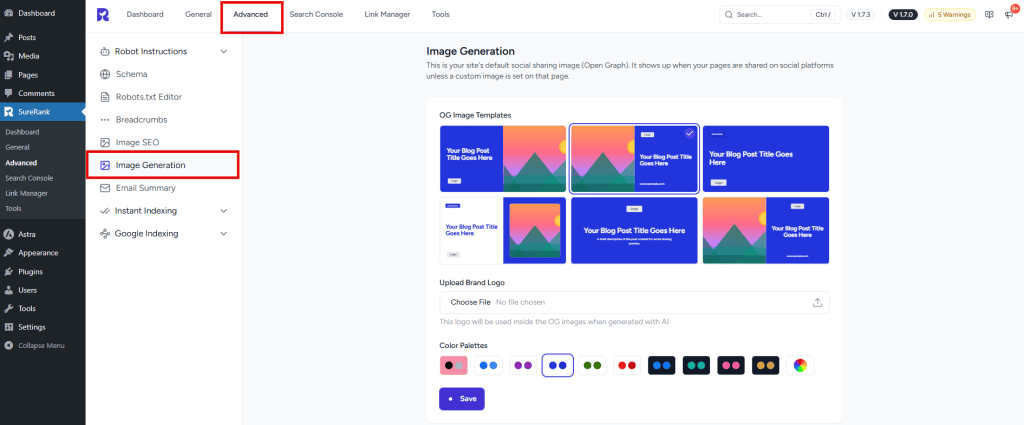
This section contains your site-wide default settings. Whenever you generate an Open Graph image for a post or page, these configurations are automatically applied as the starting point.
Step 2: Select a Template
SureRank offers six professionally designed Open Graph image templates, ranging from bold, image-focused layouts to clean, text-first designs. Simply choose the one that best fits your content style from the Template Selector.
| Template Name | Description |
| Split Left | Text on the left, background image on the right |
| Split Right | Background image on the left, text + site URL on the right |
| Badge Center | Full-color background with a badge label and title |
| Badge Split | Badge + text on the left, framed image on the right |
| Centered | Centered logo, title, and description |
| Clean Split | Image on the left, clean text layout on the right |
How it works:
- Select a template from the visual preview cards.
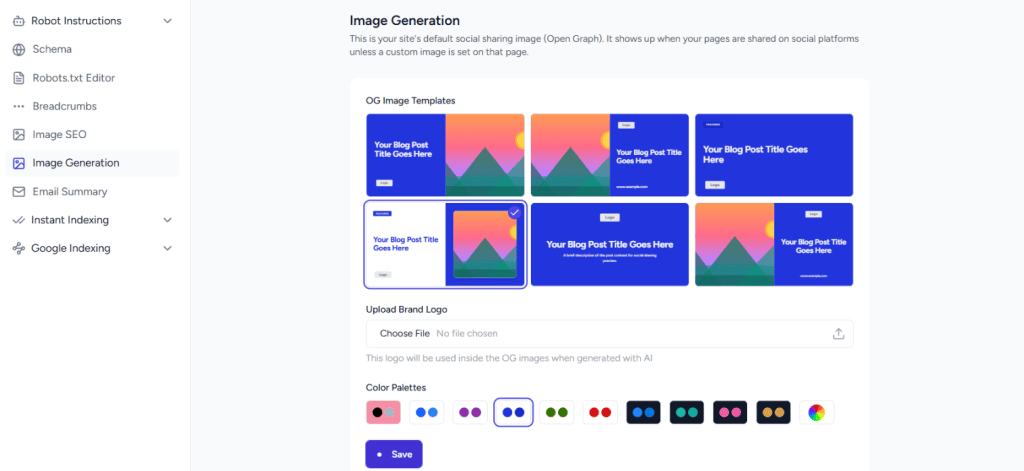
- Templates that use images will show a placeholder until you add one.
- Your selected template becomes the default for all future Open Graph image generations (you can change it anytime).
Step 3: Select Brand Logo
Upload your site logo so every Open Graph image clearly reflects your brand and stays visually consistent across social shares.
Follow these steps:
- Under Upload Brand Logo Click Choose File to open the WordPress Media Library or upload a new file.
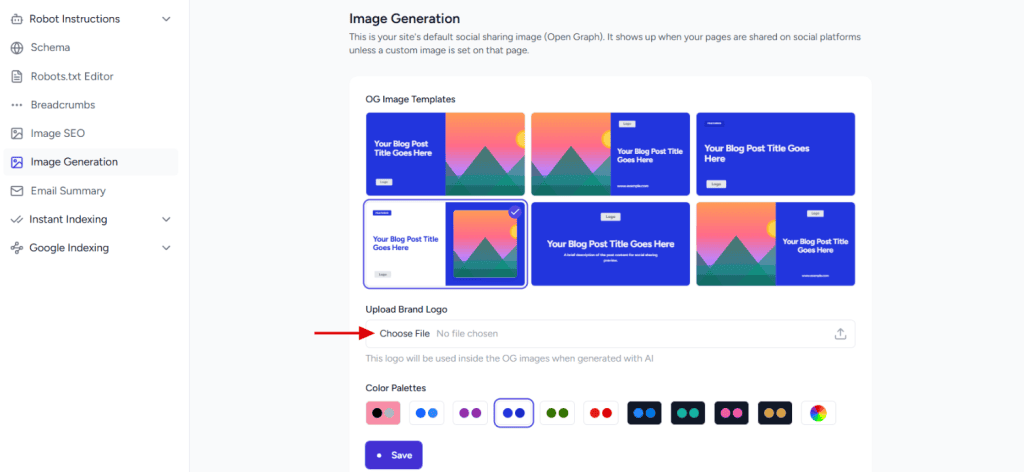
- Select your logo and confirm the upload.
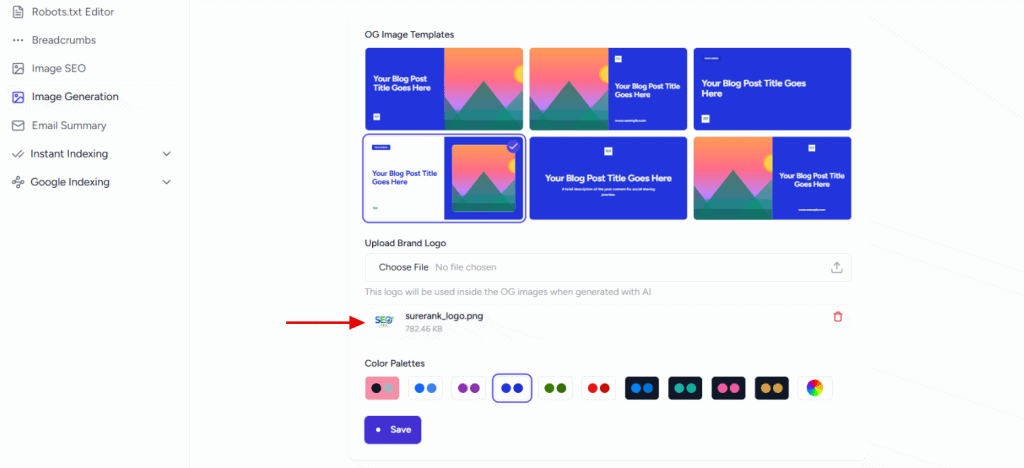
- To remove it, click on the Delete icon next to the preview.
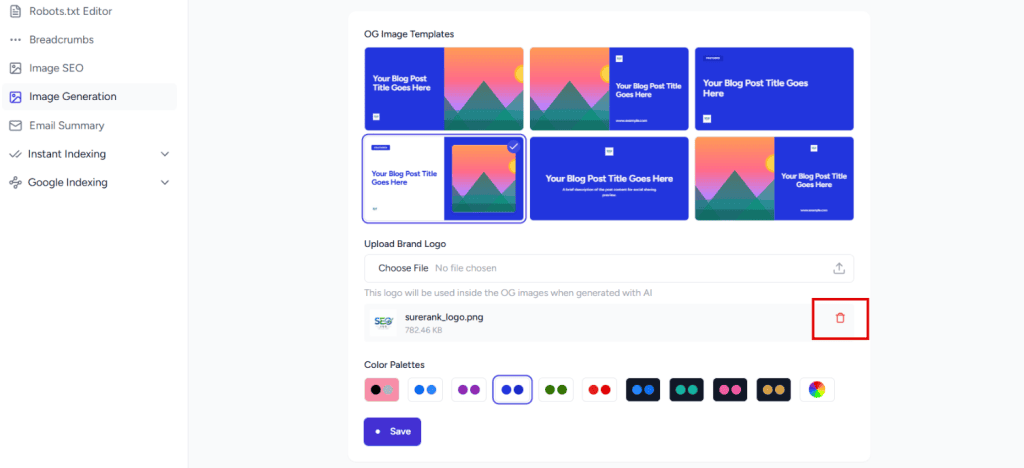
- If no logo is added, a placeholder will be shown in the preview.
Tips for best results:
- Use a PNG with a transparent background.
- Prefer square or landscape logos for a better fit within the layout.
Step 4: Choose Your Color Palette
Pick a palette that reflects your brand and keeps your Open Graph images visually consistent across every share.
You can either:
- Select from preset palettes for a quick, polished look.
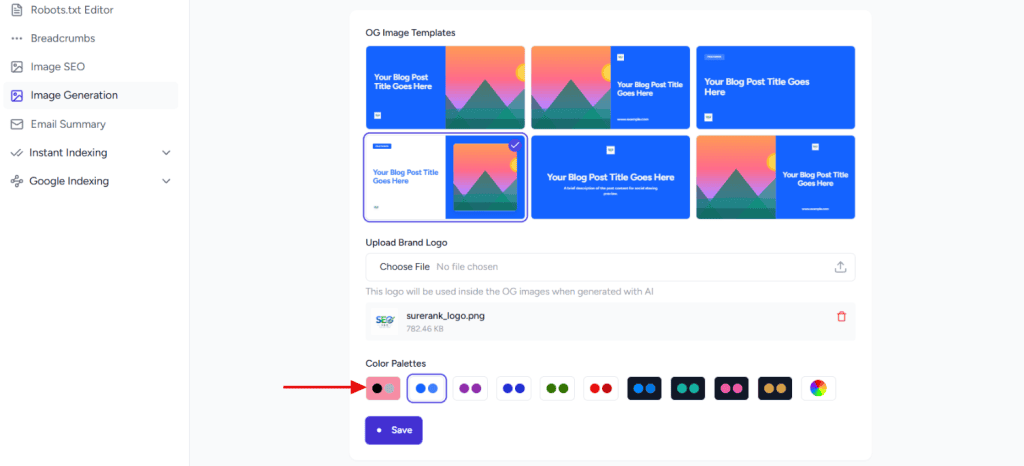
- Use a Custom Palette to match your exact brand colors.
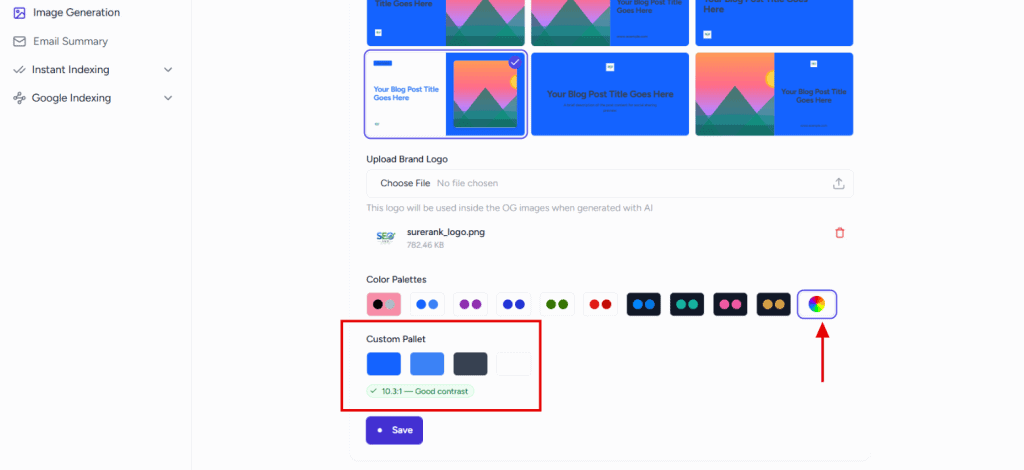
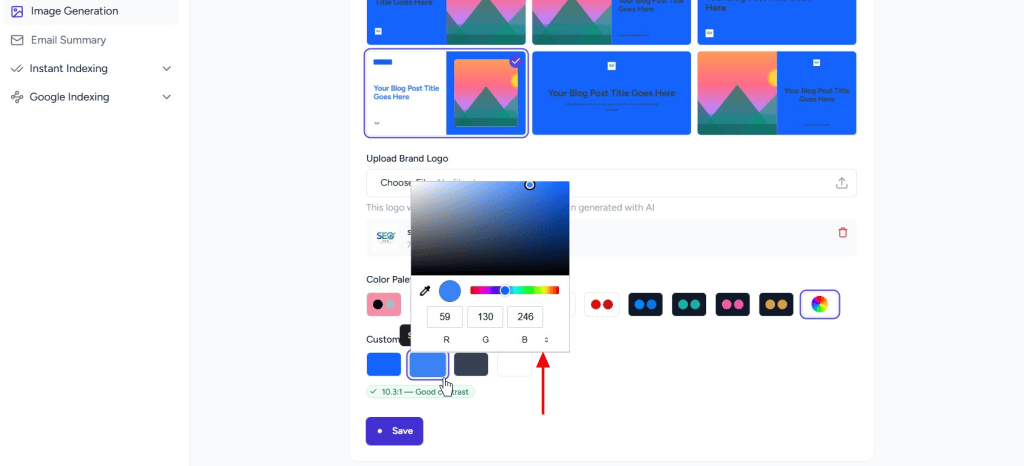
When you switch to Custom, SureRank seeds the picker with your current theme colors so you can click on each color and adjust from there.
Step 5: Save Your Settings
Click Save to apply your changes. Your Open Graph images will now use the selected settings automatically.
Set up Default Social Image
The Default Social Image is your site-wide fallback image used for social sharing. It ensures that every link shared from your website has a clean, professional preview, even when no specific image is set.
To set up fallback Social Image:
- Go to SureRank → General
- Open Social Settings → Default Social Image
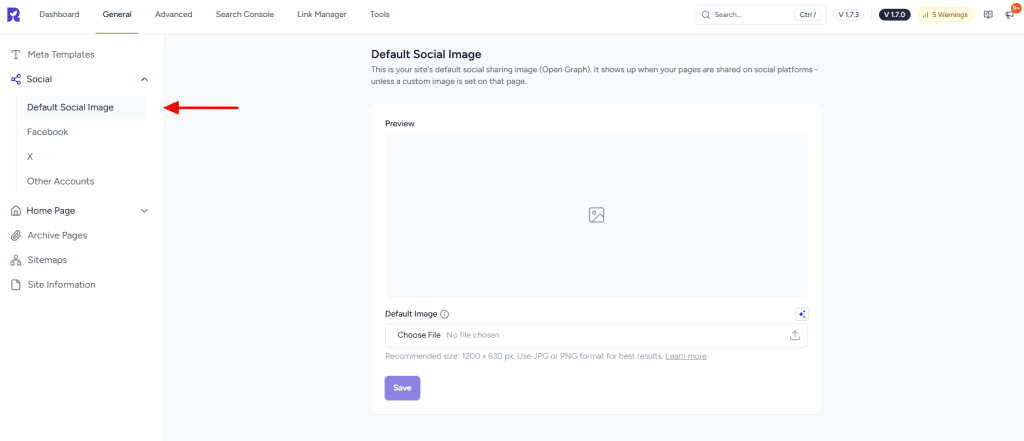
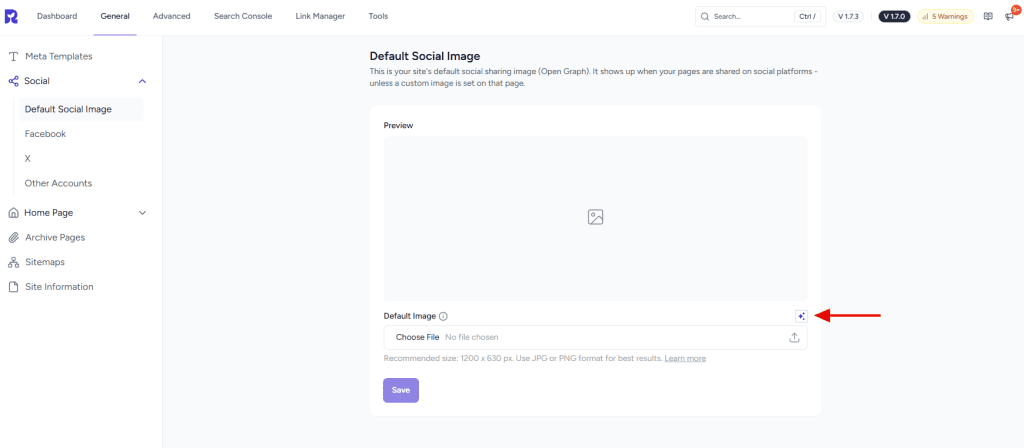
Here, you can set a site-wide default social image. This image is automatically used when:
- A post or page has no featured image
- No custom social image is set for that specific post
You’ll see three tabs to choose from:
- Search Results
Enter a keyword (like SEO) and pick from a curated set of images. By default, the search uses your site title to suggest relevant options. - Upload Your Images
Upload your own image to use as the base for generation. - Selected Images
View and choose from images you’ve already picked during this process.
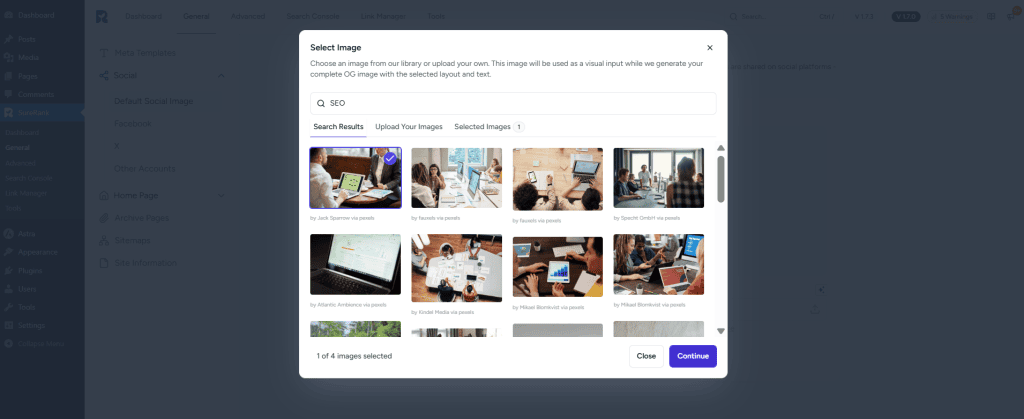
Once you’ve selected an image, click Continue.
You’ll see a preview of your final image, generated based on the template selected in your Image Generation settings.
Here’s what you can do next:
- Review the design
See how your image will appear when shared on social platforms.
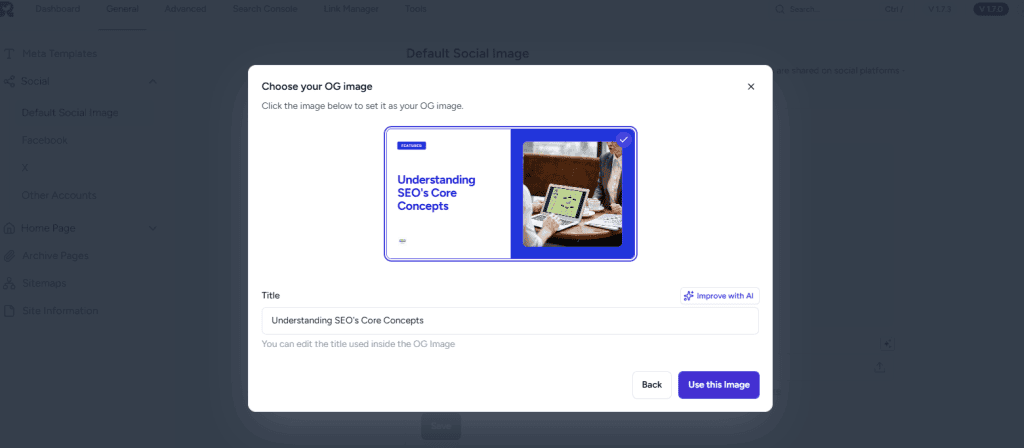
- Edit the title
Update the text that appears inside the image. - Improve with AI
Click this option to refine or enhance your title automatically.
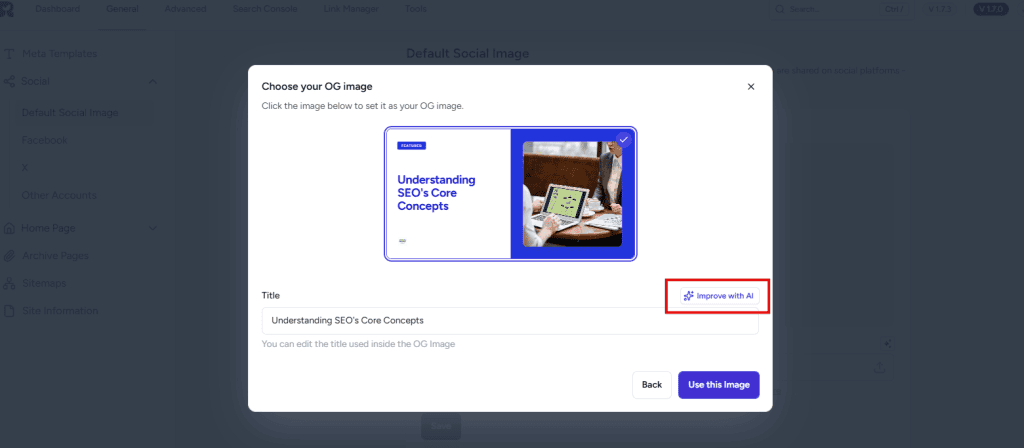
When everything looks good, click Use this Image to apply it as your default social image.
Set a Custom Social Image for a Page or Post
- Go to Pages or Posts
- Click Edit on the page or post you want to update.
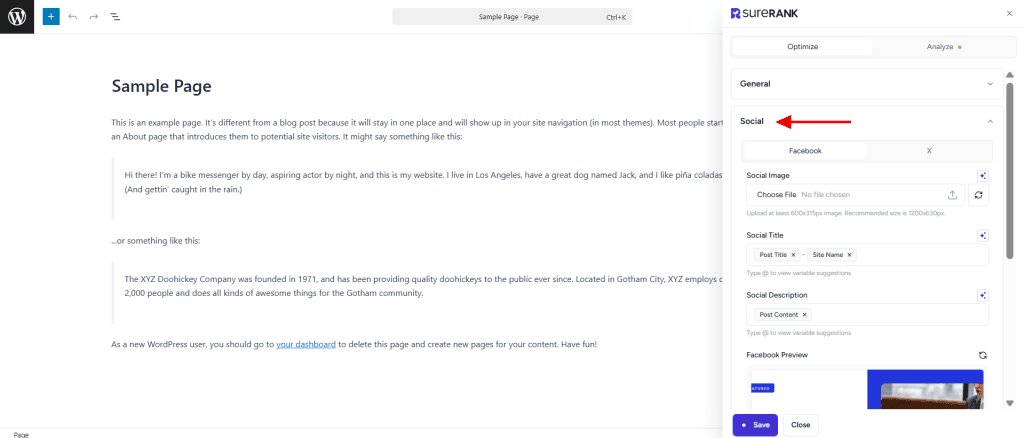
- Click the SureRank icon to open the metabox
- Navigate to Optimize → Social
- Click the magic box icon to generate a social image for that page or post.
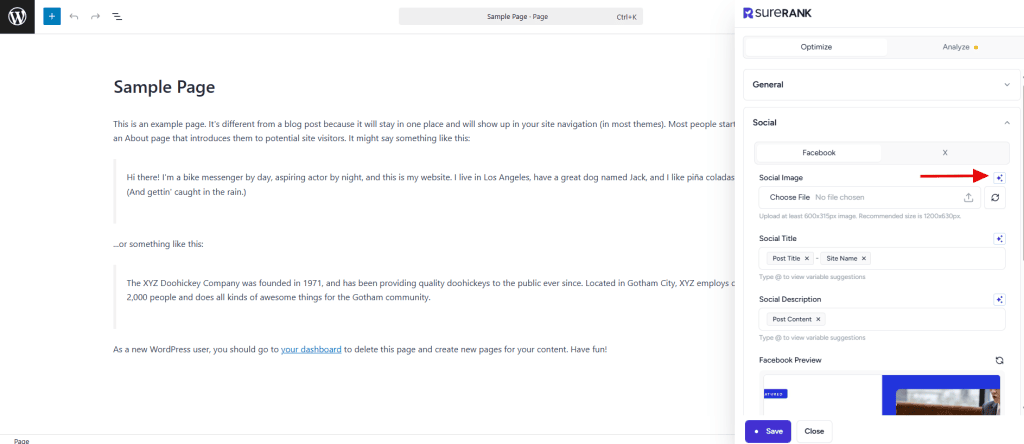
- Select an image, preview it, and optionally use Improve with AI to refine the title.
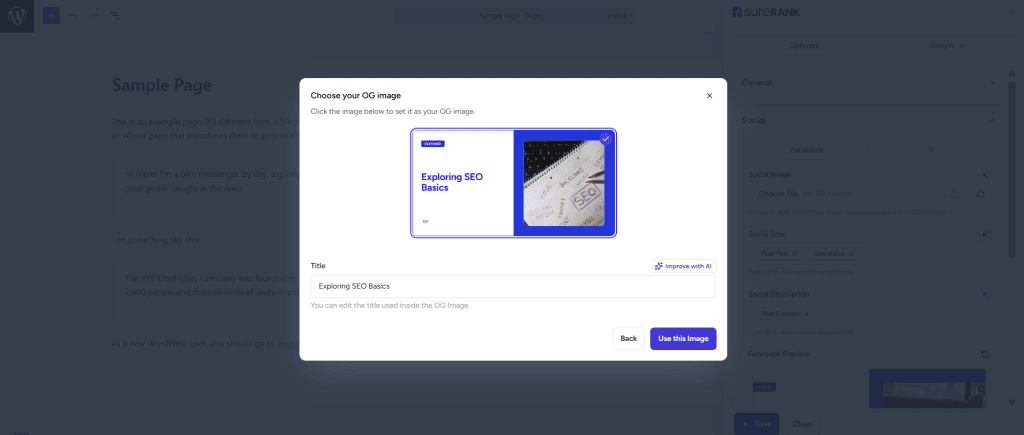
- Once done click on Use this image and Save
You can follow the same steps for both Facebook and X tabs.
With SureRank’s social image features, you can ensure every page on your site has a clean and consistent preview when shared. Set a default social image to cover your entire site, then customize individual pages or posts whenever needed for better control.
The AI-powered generation, built-in previews, and quick editing options make the process fast and straightforward. You can create, refine, and apply images directly from your dashboard without extra tools or manual design work.
Once everything is set, your content is always ready to be shared with professional, attention-grabbing visuals across platforms like Facebook and X.
We don't respond to the article feedback, we use it to improve our support content.