- Sitemaps in SureRank
- How to Enable Video Sitemap in SureRank Pro
- How to Enable the News Sitemap in SureRank
- How to Show the HTML Sitemap on Your Site in SureRank Pro
- How to Regenerate the Sitemap After Excluding a Post Type in SureRank
- Change the Sitemap URL in SureRank
- How to Enable Author Sitemap in SureRank
- How to Fix WWW and Non-WWW Version Redirects to Improve Your SEO
- How to Fix: No H1 Heading Found on Your Homepage
- How to Fix Missing H2 Headings on Your Homepage
- Re-run Checks Button in SureRank
- Fix Critical Error: Another SEO Plugin Detected in SureRank
- Fix Warning: Site Tagline Is Not Set in SureRank
- How to Fix Multiple SEO Plugins Detected on Your Site
- How to Fix: Homepage is Not Indexable by Search Engines
- Warning: Homepage Does Not Contain Internal Links
- How to Fix Missing Alt Text on Homepage Images
- How to Fix: Search Engine Title is Missing on the Page
- Page Level SEO: Broken Links Detected
- How to Fix Missing Alt Text on Images
- How to Fix Page URLs That Are Too Long
- Page Level SEO Warning: No Links Found on This Page
- Page Level SEO Warning: No Images or Videos Found
- Page Level SEO Warning: Missing Search Engine Description
- Page Level SEO Warning: No Subheadings Found on This Page
- Page Level SEO Warning: Canonical Tag is Missing
- Page Level SEO Warning: Open Graph Tags Missing
- What is Google Search Console and how does SureRank use it?
- Recommended Image Sizes
- SureRank – SEO Check Severity Guide
- Using SureRank with Other SEO Plugins – Best Practices
- Import/Export Feature – SureRank Plugin
- What is llms.txt and Does SureRank Support It?
- Does SureRank offer a keyword rank-tracking feature?
- Does SureRank Come With Google Analytics Integration?
- Customize Final Title Tag surerank_final_title
- Customize Post Type Archive Title Output surerank_post_type_archive_title
- Customize Archive Page Title with surerank_archive_title
- CustomizeModify the Search Results Page Title surerank_search_title
- Customizing the 404 Page Title surerank_not_found_title
- Customizing the Title Separator surerank_title_separator
- How to Remove Archive Prefixes from Titles Using SureRank
- Customize Homepage Pagination Format surerank_homepage_pagination_format
- Customize Maximum SEO Title Length surerank_title_length
- Enable/Disable Pagination in SureRank Archives surerank_show_pagination
Page Level SEO Warning: Open Graph Tags Missing
If you’ve received a warning in SureRank saying: “Open Graph tags are not present on the page.”
This guide will help you understand what this means, why it’s important for SEO and social media, and how to fix it even if you’re not a technical user.
What’s the Problem
Open Graph (OG) tags are special meta tags that tell social media platforms (like Facebook, LinkedIn, and Twitter) how to display your page when it is shared. Without these tags, your page may appear with missing images, titles, or descriptions in social feeds, which can reduce click-through rates and social engagement.
Examples of issues caused by missing OG tags:
- No preview image when sharing the page on social media
- Missing or incorrect page title and description in social posts
- Reduced engagement and traffic from social platforms
Why This Matters
- Better Social Visibility: OG tags ensure your page looks professional and clickable when shared.
- Improved Branding: You control the image, title, and description that represent your page.
- SEO Indirect Benefit: Social signals can indirectly improve SEO by increasing traffic and engagement.
What to Do
Step 1 – Check if OG Tags are Present
- SureRank automatically detects OG tags on each page.
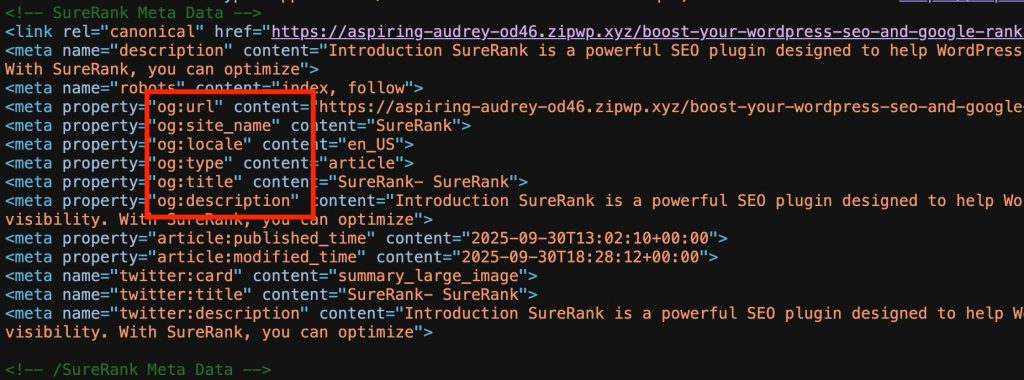
- You can also inspect your page source: look for meta tags starting with og: (e.g., <meta property=”og:title” …>).
Step 2 – Add Open Graph Tags via SureRank
- Open the WordPress dashboard.
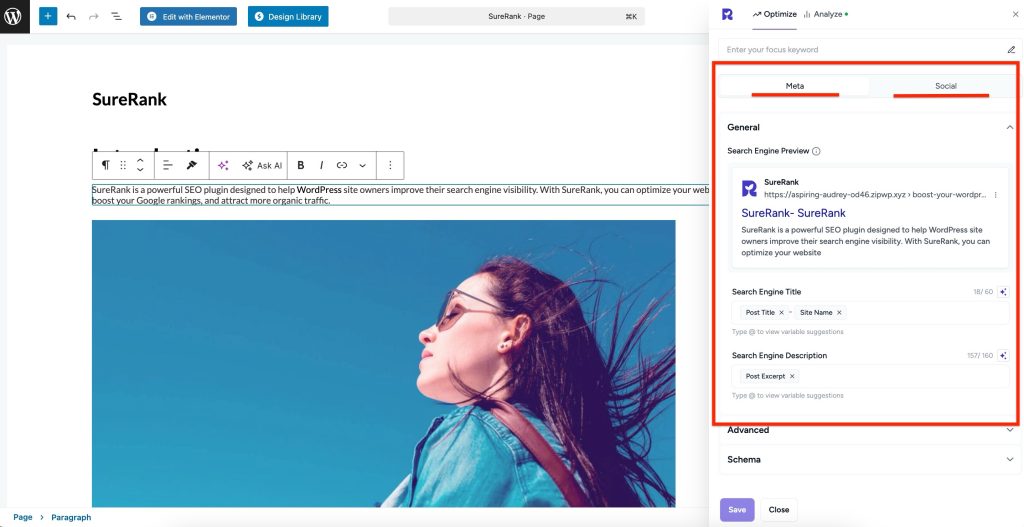
- Navigate to SureRank → Page SEO Settings.
- Fill in the following fields:
- Search Engine Title
- Search Engine Description
- Social Image
- Save changes.

SureRank will automatically add these tags to the page header after saving.

Step 3 – Optional: Set Defaults for All Pages
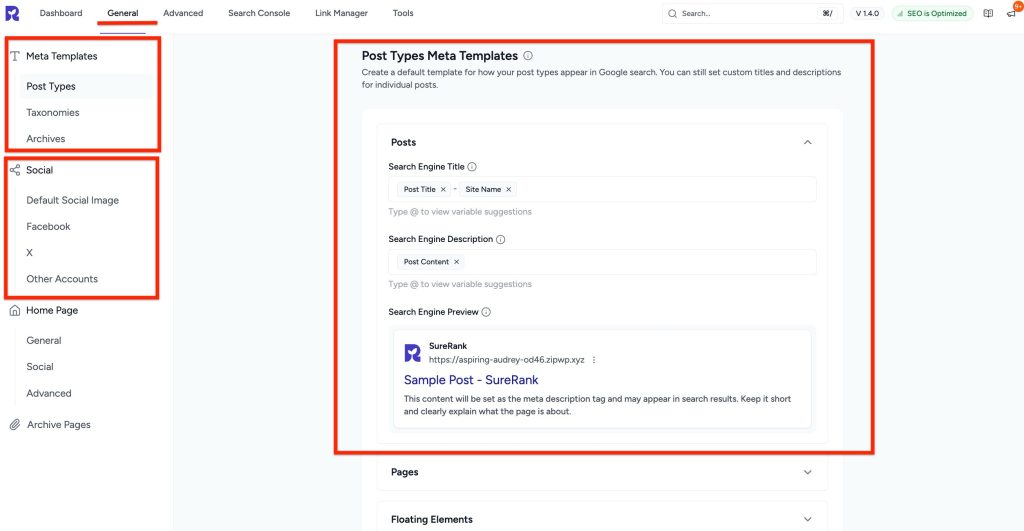
- Navigate to SureRank → General Settings
- Configure Post Types Meta Templates, Social Images.
- This ensures consistency across your site.

Step 4 – Verify with SureRank
- Edit the page in WordPress.
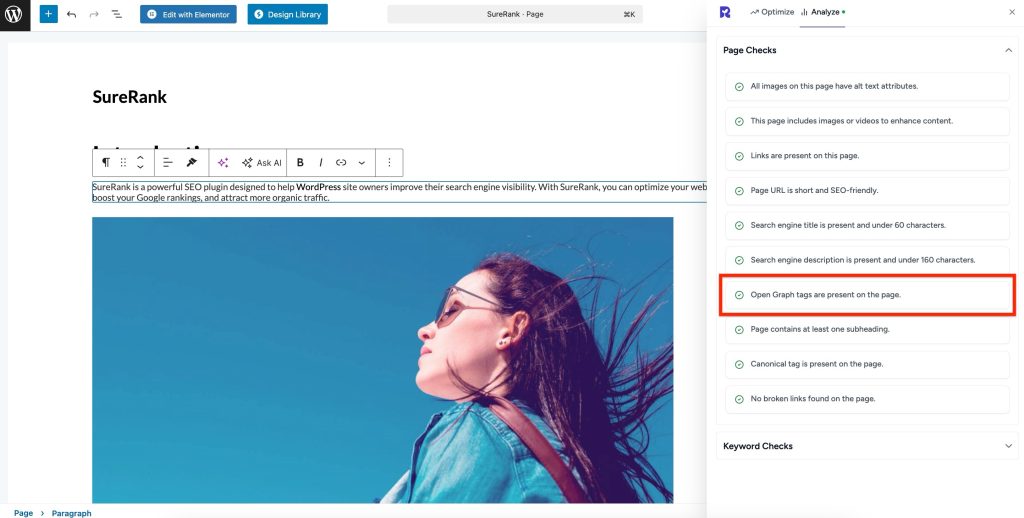
- Click the SureRank icon in the top-right corner of the editor.
- Select Analyze – this will open the Analyze tab, showing a list of Page Checks.
- Once the changes are made, the SureRank page-level check will automatically run and update the status.
- If editing the page using a Page Builder, please save your changes in the editor before refreshing the checks.

We don't respond to the article feedback, we use it to improve our support content.