- How to Fix WWW and Non-WWW Version Redirects to Improve Your SEO
- How to Fix: No H1 Heading Found on Your Homepage
- How to Fix Missing H2 Headings on Your Homepage
- Re-run Checks Button in SureRank
- Fix Critical Error: Another SEO Plugin Detected in SureRank
- Fix Warning: Site Tagline Is Not Set in SureRank
- How to Fix Multiple SEO Plugins Detected on Your Site
- How to Fix: Homepage is Not Indexable by Search Engines
- Warning: Homepage Does Not Contain Internal Links
- How to Fix Missing Alt Text on Homepage Images
- How to Fix: Search Engine Title is Missing on the Page
- Page Level SEO: Broken Links Detected
- How to Fix Missing Alt Text on Images
- How to Fix Page URLs That Are Too Long
- Page Level SEO Warning: No Links Found on This Page
- Page Level SEO Warning: No Images or Videos Found
- Page Level SEO Warning: Missing Search Engine Description
- Page Level SEO Warning: No Subheadings Found on This Page
- Page Level SEO Warning: Canonical Tag is Missing
- Page Level SEO Warning: Open Graph Tags Missing
- Customize Final Title Tag surerank_final_title
- Customize Post Type Archive Title Output surerank_post_type_archive_title
- Customize Archive Page Title with surerank_archive_title
- CustomizeModify the Search Results Page Title surerank_search_title
- Customizing the 404 Page Title surerank_not_found_title
- Customizing the Title Separator surerank_title_separator
- How to Remove Archive Prefixes from Titles Using SureRank
- Customize Homepage Pagination Format surerank_homepage_pagination_format
- Customize Maximum SEO Title Length surerank_title_length
- Enable/Disable Pagination in SureRank Archives surerank_show_pagination
How to Migrate from Yoast to SureRank
This guide will help you easily move your SEO settings from Yoast SEO to SureRank SEO using the built-in migration tool.
Back Up Your Website
Before making any changes, create a backup of your website. This will help protect your data in case anything unexpected happens.
Open the Migration Tool
- Log in to your WordPress admin dashboard.
- Go to SureRank > Tools > Migrate tab.
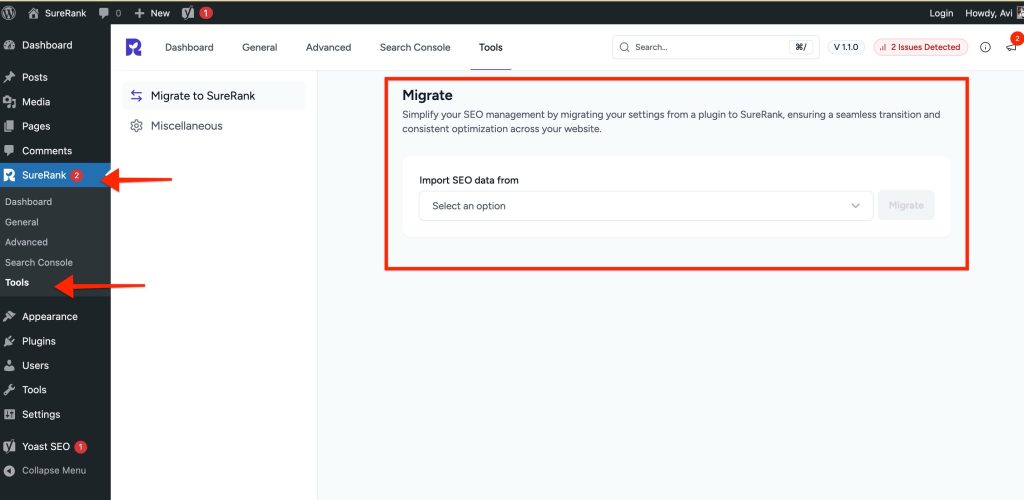
Start the Migration
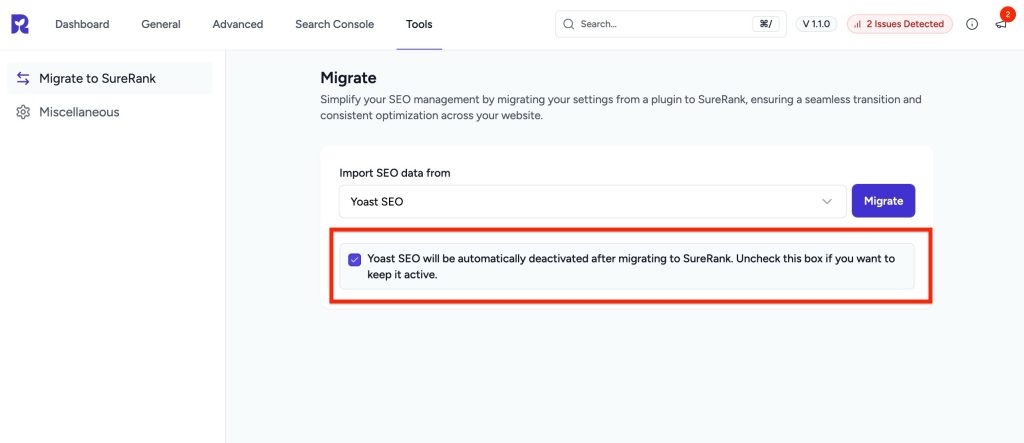
- On the Migrate page, look for the Import SEO data from section.
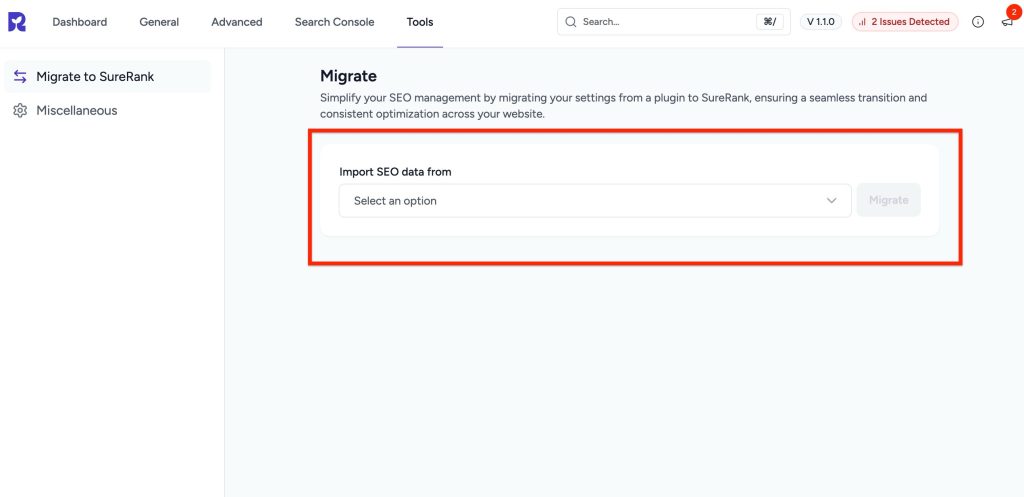
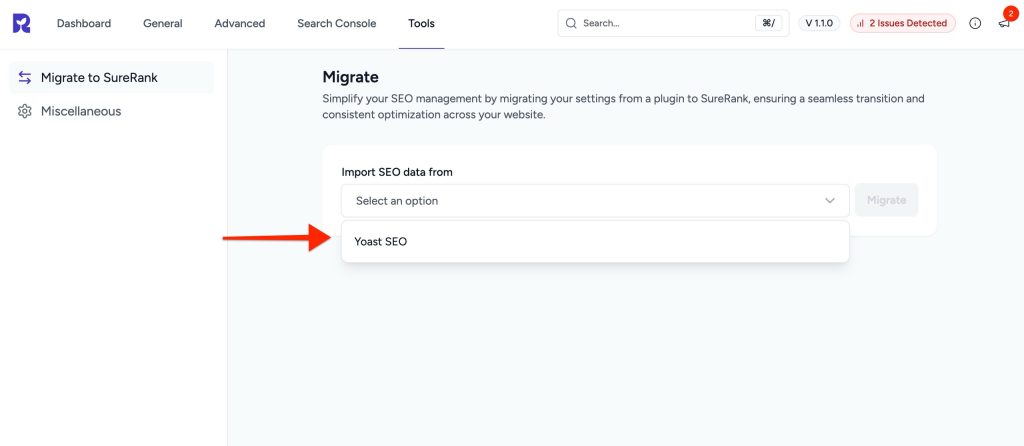
- Select Yoast SEO from the dropdown menu.
- Click the Migrate button to start the process.
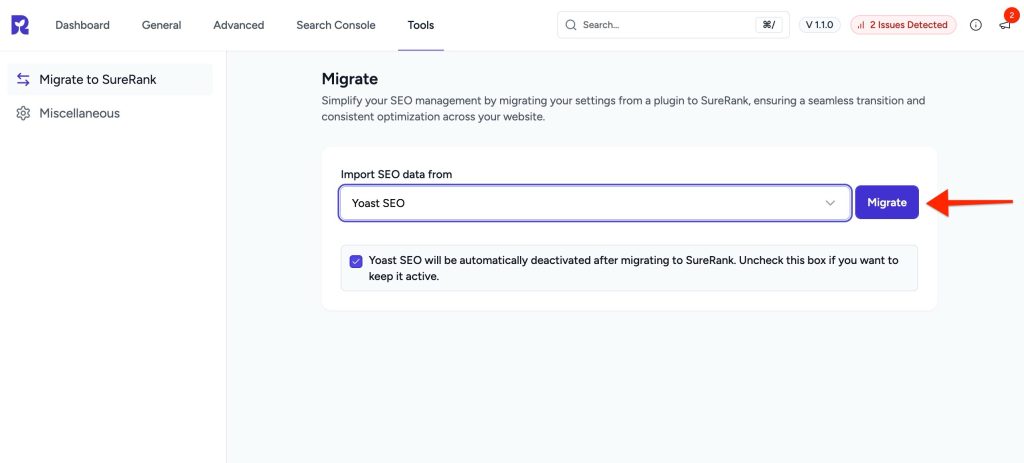
By default, Yoast SEO will be deactivated after migration. If you want to keep it active, uncheck the box before migrating.
What to Do if Migration Is Interrupted
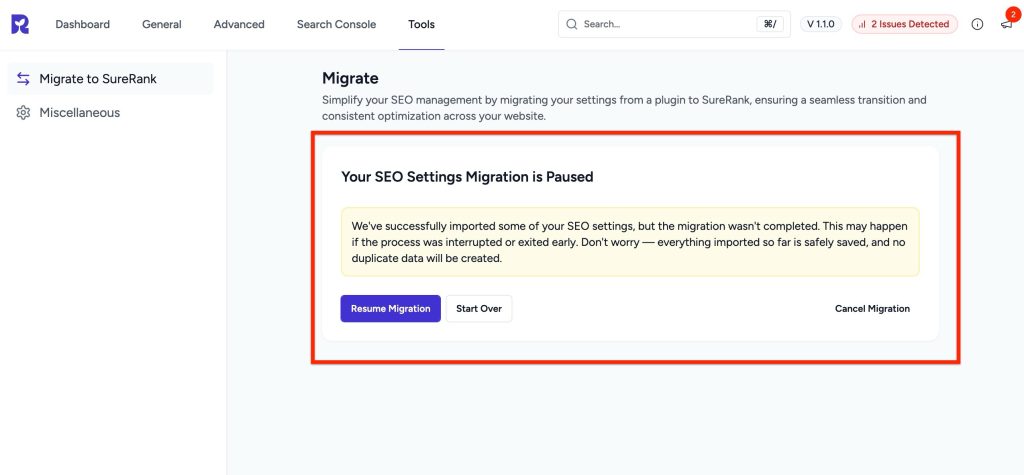
If you leave the migration page or switch tabs before the process is finished, the migration will pause. When you return, you’ll see a message saying your migration is paused. Everything imported so far is safely saved, and no duplicate data will be created.
You can choose to:
- Resume Migration – Continue from where you left off.
- Start Over – Start the migration again from the beginning.
- Cancel Migration – Stop the migration if you no longer want to continue.
What Gets Imported
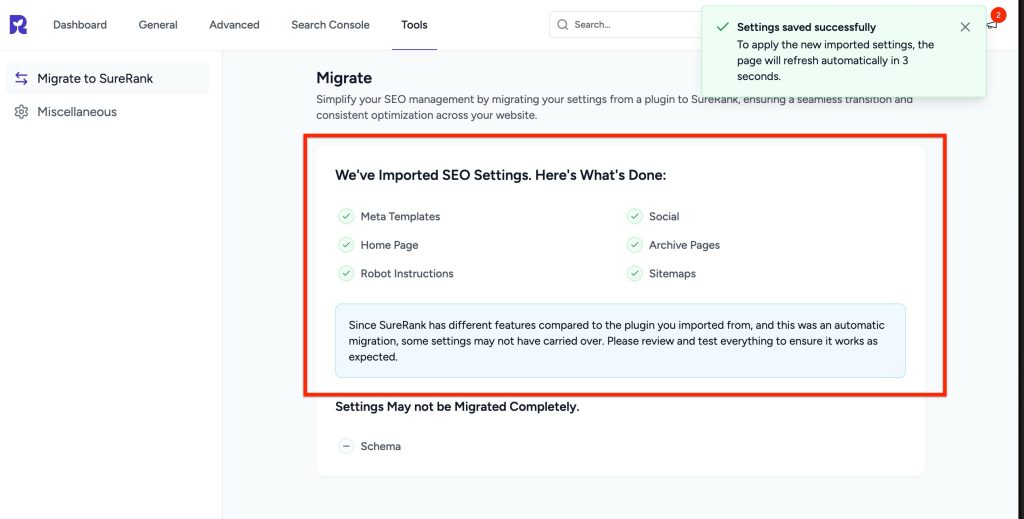
SureRank will import the following settings from Yoast SEO:
- Meta Templates
- Social
- Home Page
- Archive Pages
- Robot Instructions
- Sitemaps
Final Checks
- Review your SEO settings in SureRank after migration.
- Test your homepage, archives, and social previews.
- Adjust any settings as needed.
SureRank Pro: Migrate Redirections, Extended Meta Templates from Yoast SEO Premium
With SureRank Pro, you can now import your Yoast SEO Premium redirections along with your SEO settings.
How to Migrate Redirections, Extended Meta Templates
- Follow the regular migration steps to import your SEO settings from Yoast.
- SureRank Pro will also import your Yoast SEO Premium redirections and Extended Meta Templates during this process.
Verify Imported Redirections
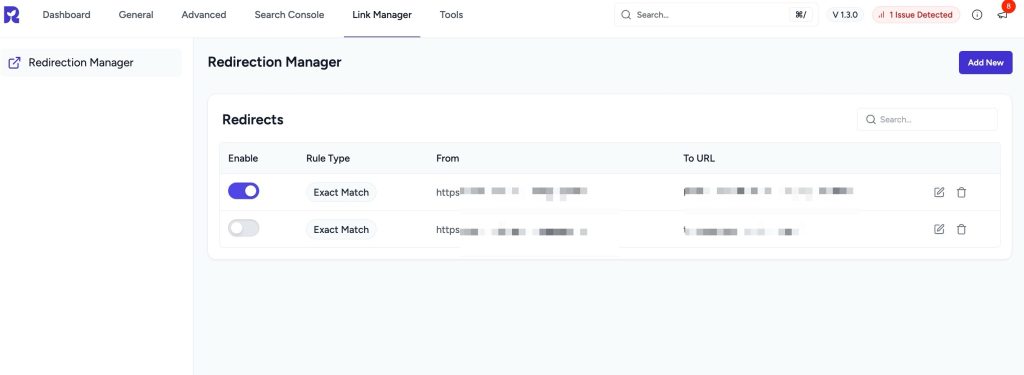
- Go to SureRank > Link Manager > Redirection Manager in your WordPress dashboard.
- Check that your Yoast SEO Premium redirections are listed there.
Requirements
- SureRank Pro must be installed and active.
- Yoast SEO Premium must also be active so SureRank can detect and import the redirections.
Done! All your Yoast SEO Premium redirections are now managed in SureRank Pro.
Note: SureRank does not migrate Schema data. Only the global and page-level SEO settings available in SureRank will be imported. After migration, review your settings in SureRank and manually set up any features that were not included.
By following these steps, you can easily move your SEO settings from Yoast SEO to SureRank SEO.
We don't respond to the article feedback, we use it to improve our support content.