- Sitemaps in SureRank
- How to Enable Video Sitemap in SureRank Pro
- How to Enable the News Sitemap in SureRank
- How to Show the HTML Sitemap on Your Site in SureRank Pro
- How to Regenerate the Sitemap After Excluding a Post Type in SureRank
- Change the Sitemap URL in SureRank
- How to Enable Author Sitemap in SureRank
- How to Fix WWW and Non-WWW Version Redirects to Improve Your SEO
- How to Fix: No H1 Heading Found on Your Homepage
- How to Fix Missing H2 Headings on Your Homepage
- Re-run Checks Button in SureRank
- Fix Critical Error: Another SEO Plugin Detected in SureRank
- Fix Warning: Site Tagline Is Not Set in SureRank
- How to Fix Multiple SEO Plugins Detected on Your Site
- How to Fix: Homepage is Not Indexable by Search Engines
- Warning: Homepage Does Not Contain Internal Links
- How to Fix Missing Alt Text on Homepage Images
- How to Fix: Search Engine Title is Missing on the Page
- Page Level SEO: Broken Links Detected
- How to Fix Missing Alt Text on Images
- How to Fix Page URLs That Are Too Long
- Page Level SEO Warning: No Links Found on This Page
- Page Level SEO Warning: No Images or Videos Found
- Page Level SEO Warning: Missing Search Engine Description
- Page Level SEO Warning: No Subheadings Found on This Page
- Page Level SEO Warning: Canonical Tag is Missing
- Page Level SEO Warning: Open Graph Tags Missing
- What is Google Search Console and how does SureRank use it?
- Recommended Image Sizes
- SureRank – SEO Check Severity Guide
- Using SureRank with Other SEO Plugins – Best Practices
- Import/Export Feature – SureRank Plugin
- What is llms.txt and Does SureRank Support It?
- Does SureRank offer a keyword rank-tracking feature?
- Does SureRank Come With Google Analytics Integration?
- Customize Final Title Tag surerank_final_title
- Customize Post Type Archive Title Output surerank_post_type_archive_title
- Customize Archive Page Title with surerank_archive_title
- CustomizeModify the Search Results Page Title surerank_search_title
- Customizing the 404 Page Title surerank_not_found_title
- Customizing the Title Separator surerank_title_separator
- How to Remove Archive Prefixes from Titles Using SureRank
- Customize Homepage Pagination Format surerank_homepage_pagination_format
- Customize Maximum SEO Title Length surerank_title_length
- Enable/Disable Pagination in SureRank Archives surerank_show_pagination
Enabling Page SEO Checks in WordPress
SureRank makes it easy to monitor the SEO health of your content right from the WordPress dashboard. One powerful feature is the Page SEO Checks column on the “Pages” screen, which gives a quick overview of each page’s SEO status.
Follow the steps below to enable this option:
Step 1: Go to the Pages Screen
From your WordPress dashboard, navigate to Pages > All Pages.
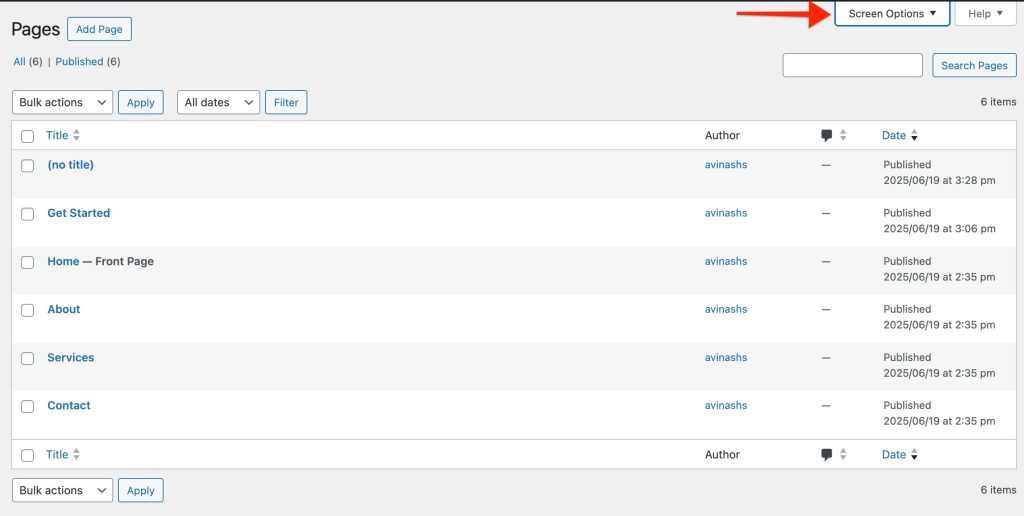
Step 2: Open Screen Options
Click on the Screen Options tab located in the top-right corner of the screen. This will expand a drop-down panel.
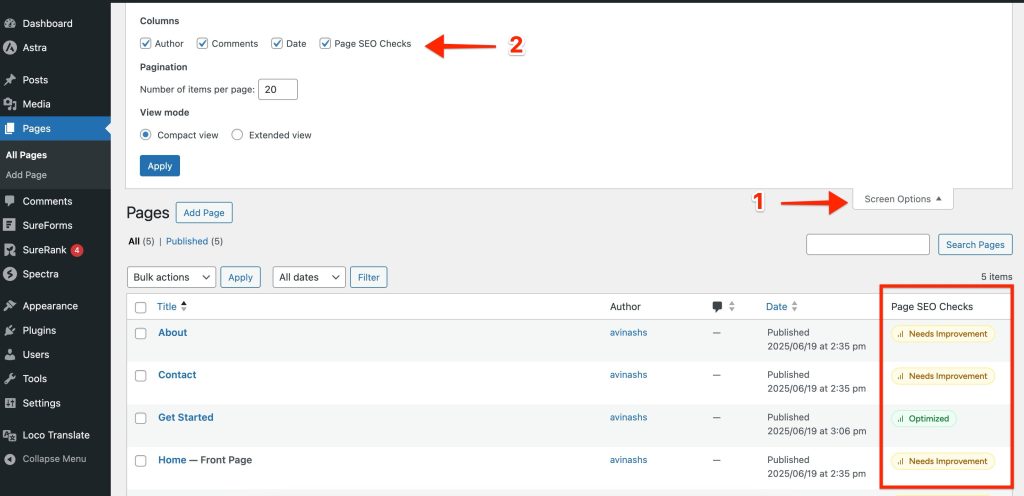
Step 3: Enable “Page SEO Checks”
In the dropdown, check the box labeled Page SEO Checks. This will add a new column to the Pages table view.
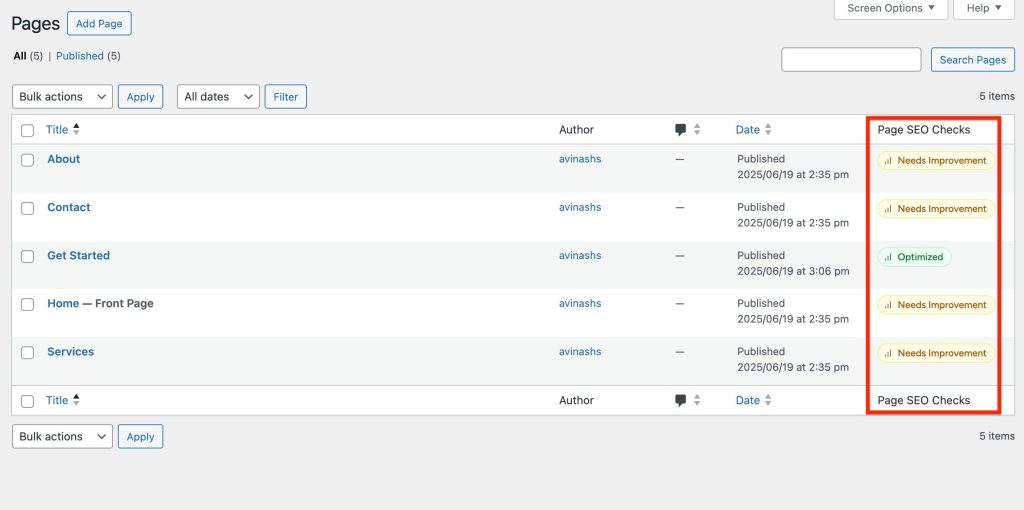
Step 4: Review SEO Check Results
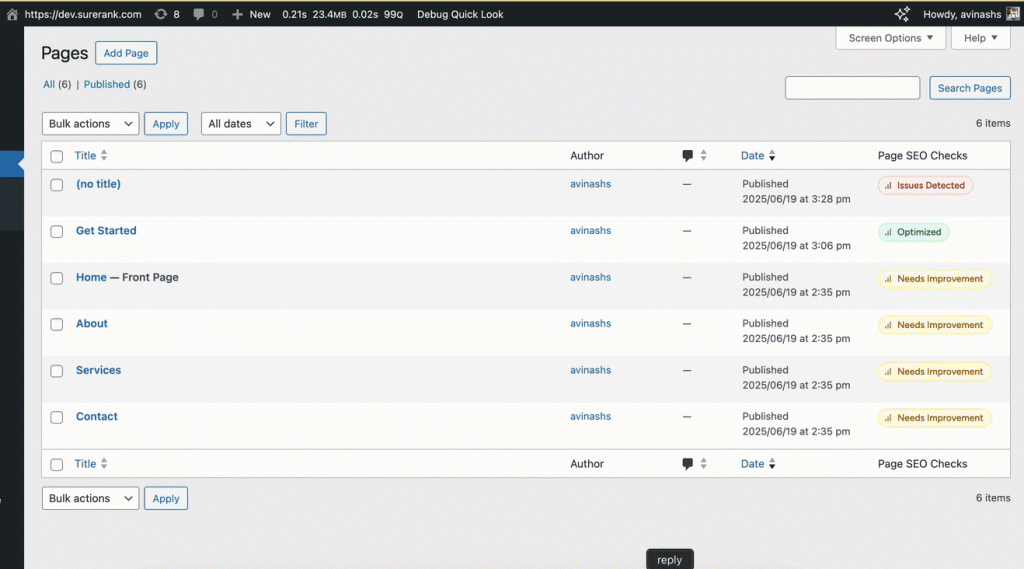
Once enabled, you’ll see a new Page SEO Checks column beside each page entry. Each page will display page health.
- Issue Detected – This status indicates that the page has one or more critical SEO issues. These should be addressed as a priority to improve your site’s visibility and performance.
- Needs Improvement – The page is missing some recommended SEO best practices. While not critical, addressing these issues can help enhance your rankings.
- Optimized – The page has passed all key SEO checks and is considered optimized. No immediate action is needed.
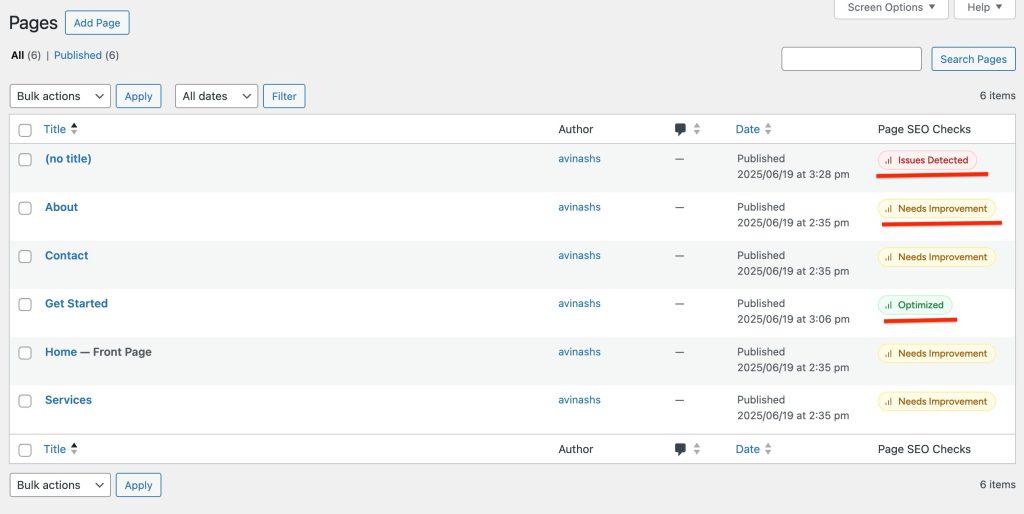
Clicking on any of these badges opens a slide-in panel that shows a detailed list of SEO checks and suggestions for that page.
For a complete explanation of each severity level and how they’re determined, visit the SureRank SEO Check Severity Guide.
Tip: Regularly reviewing your Page SEO Checks helps maintain strong on-site SEO and improves your chances of ranking higher in search engines.
We don't respond to the article feedback, we use it to improve our support content.